Help on sig

DKnight556

Member
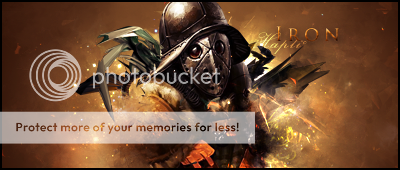
This is my first good sig that i have made ( in my opinon). Can someone give me some pointers to make my next one better?
better_Sora_Sig.png
 

MightySheep

Member
Text isn't always necessary

It's difficult to make a nice looking sig with 100px limit but to make better ones I suggest

following some tutorials
get some cool brushes
blend your render with background more
Add some 'adjustments' like softlight 30% gradient map over top to make blend into wholer image
 

Snooks

New Member
Hard to give pointers without writing tutorials out. You're still pretty young, so I'm sure you have have time! Search on Google for Photoshop(or whatever program you are using) tutorials and techniques.
 

DKnight556

Member
Thanks much. I have read alot of tuts for c4d usage in gimp and this was my first attempt at making the c4d wrap around the render. I didn't add text so that it wouldn't ruin the flow following the trail of the c4d to Soras face.

Can someone sticky some tuts for sigs to the forums? That would help a lot of people out
 

Dacil

Member
at first glance, sora looked like he was spewing out a glowy trail from his mouth XD, but overall its nice...yes text isn't necessary but it's nice to have imo...i would just move the glowy thing away from his mouth
 

DKnight556

Member
LOLZ
I can't do that sadly. The image was flattened when exporting from gimp.
Does anyone have some good c4ds I can have?
 

Haptic

Member
LOLZ
I can't do that sadly. The image was flattened when exporting from gimp.
Does anyone have some good c4ds I can have?
This website has a lot of tuts and resources that are free and very useful. Check it out. Also, search C4D on DeviantArt. They do have packs too, very nice ones at that.
 

Dacil

Member
yeah dA is a great source for stock images, application resources, etc. very useful stuff for digi artists
 
You should insert the sig into your original post, instead of showing it in your signature, as it is bound to change eventually.
I suggest you add your name in white/light glowing blue somewhere in the lower-left part of the signature, below the curve of light in the background.
The render to the right, at first glance, seems to contribute to the flow, but if you look at it a bit longer you'd notice that it was a bit sharp around the edges, and a fading effect would be good. Also, apply some gaussian blur around the edges, and tweak around with motion blur a little with a duplicate of the layer.
Replicating the glowing bokeh-like spheres near the top-right of the background render, extract the black from it (chances are you added the black background yourself, but if not, you can use the Color-to-Alpha tool in GIMP to remove the color black from the layer), and replicate it, then use motion blur to get a nice flow with the background (I suggest a top-left to lower-right blur to make it streamlined with the streak in the background).
But overall, your color scheme was nice, and the sig flows well.
Also, you can use the Overlay layer option with a layer that's partly painted white and partly painted black (or other colors if you so choose) to make parts of the image darker/lighter. Like, make the face lighter and the upper-right sections of the hair gradually darker. Could use the gradient tool, but it gets messy that way.
 

Haptic

Member
I suggest you add your name in white/light glowing blue somewhere in the lower-left part of the signature, below the curve of light in the background.
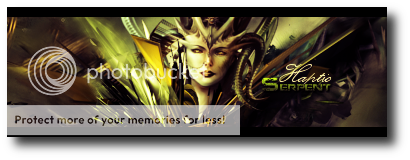
I disagree. Your name/text should go along with your sig; fit into the flow of it. And you don't really want to place a glow around text, just makes it look mediocre. Best thing is to place a nice gradient over the text and some drop shadow effects. Just use a pleasant font that follows the theme of your sig and add a gradient to color the text.
Such as this one:
IronSig-1.png

Or this one:
SerpentSig.png

Both using gradients over the main title of the sig; using colors that correspond to the colors in the signature. And my name just a simple fancy smansy font in an off-white.

And to add that final touch to signatures, add a color gradient. To do that, pick two colors, one for the foreground, and one for the background. I like to use blue foreground and yellow background, or purple foreground and yellow background. Next, go to Edit>Copy Visible and make a new layer, then go Edit>Paste, and anchor it to the layer. Lastly go to Colors>Map>Gradient Map. Play with the layer properties, I usually put it on Overlay at 40-80% opacity. Just gives you more vibrant colors.
 

DKnight556

Member
On my new one i used a curly text because the the organic look of the c4ds. Then I faded the 5 and 6 of my name into the second background layer.
Sorafalling1-1.png
 

Dacil

Member
ooOoooO i like this a lot better...esp the text...even tho its hard to see, all you need to see is the "DKnight" anyway
 

BestCharmie

Member
Add some highlights, the image is too confusing. Add highlights only to where you want people to look at, like your name..(It's tiny!)

My sig is just a simple sig. I dont work on it much.
 
Top